Friday, November 22, 2013

Beefsteak Cultivar Trials- Part 1 (The Pictures)


Beefsteak Cultivar Trials- Part 1 (The Pictures)
By Dr. Natalie Bumgarner

Objectives

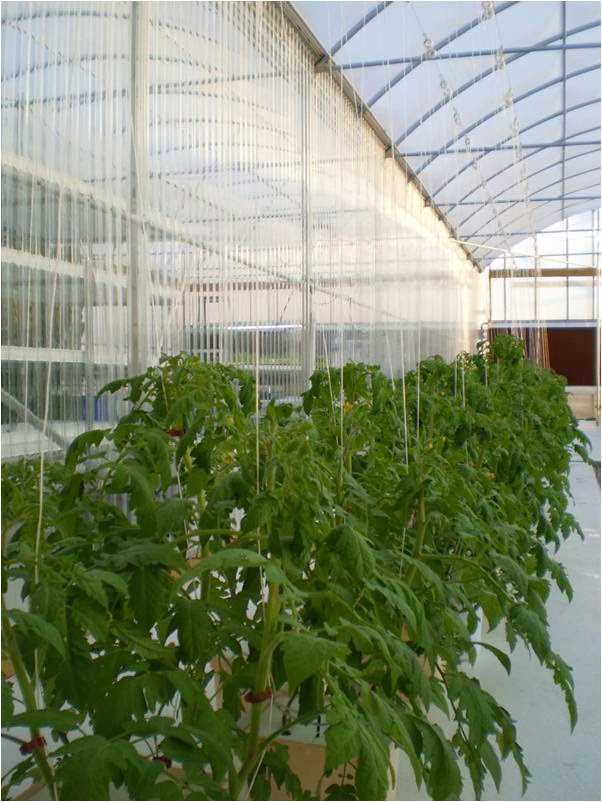
Greenhouse tomato production in the United States now encompasses a wide spectrum of fruit types and cultivars. Producers desire both attractive and distinctive crop cultivars to meet consumer demand, but consistency in both productivity and quality is still a key. Even with the increasing desire for specialty cultivars, many small to mid-scale growers still often establish and maintain their a large portion of their sales with beefsteak tomatoes. For many US consumers, high visual and taste quality in beefsteak tomatoes is the basis for greenhouse tomato price premiums. Because many greenhouse vegetable producers rely on a few specific cultivars, the production and reliability of those cultivars is essential.  Additionally, over time their customers become accustomed to the taste and appearance of a certain cultivar and change must be carefully weighed. However, cultivars are sometimes discontinued or unavailable due to seed shortages, so being familiar with other options is quite important for growers. We generally encourage tomato growers to trial small sections of different cultivars on a consistent basis to remain up to date on new offerings and to be prepared if they are forced to switch cultivars.  It is obviously important for us at CropKing to be familiar with cultivar options for growers. So, this evaluation was carried out both to increase our knowledge of several available beefsteaks and to provide information for growers who may be considering these tomatoes as options for their current crops.  Cultivars were obtained from a variety of seed suppliers to represent a broad selection of cultivars available to greenhouse tomato producers. 

Crop Overview

• Ten cultivars were trialed in a small block, two replicate evaluation
• Seeded 12/18
• Transplanted 1/14
• First harvest 4/8
• Growing point removal 11/11
• Last harvest likely will occur between 12/15 and 12/25


Plant Management

•All ungrafted seedlings transplanted from 1.5” rockwool cubes into perlite filled Bato buckets
•Plant density was 4 ft2 per plant or 2.7 plants/m2
•Began feeding seedlings  at 1.5 mS/cm EC and increased feed to 2.2-2.4 mS/cm as mature plants
•Target leach ECs were 0.3-0.6 above feed ECs (2.5 to 2.8 mS/cm)

Data Collection and Calculations

Cluster number and harvestable fruit count at each cluster
Plot weight and fruit counts at each harvest
Cumulative fruit yield as well as a breakdown across the season
Average fruit weight across the season

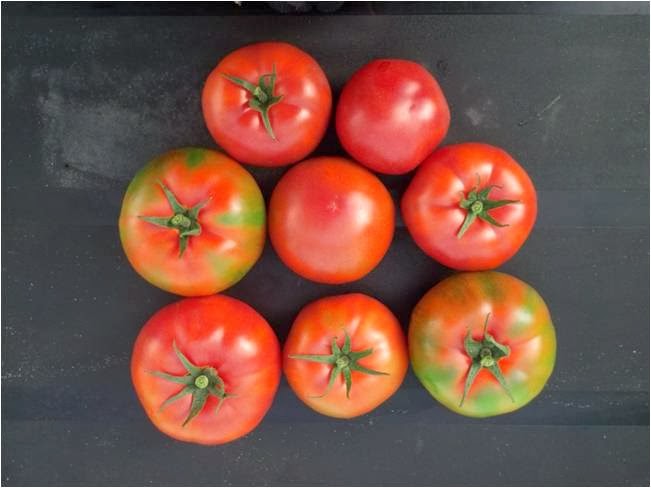
The images and fruit weights presented here represent an April harvest with fruit from the 1st and 2n
clusters. The November pictures were taken near the end of the crop and were generally fruit
produced on the 25th through 28th clusters.  

In an upcoming blog after harvest is complete for the year, there will be a post that describes
comparative yield and fruit size throughout the season. This blog is designed to introduce the cultivars
and provide some initial visuals and fruit weights at an early and late harvest to provide a general
overview of the cultivars with more analysis and summary data planned for a later blog. 

The Cultivars


Average fruit wt. these two harvest dates


BigDena-April 0.581 lb
BigDena-November 0.502 lb


Foronti-November 0.601 lb
Foronti-April 0.837 


Guyana-November 0.438 lb
Guyana-April 0.525 lb


Heritage-November 0.516 lb
Heritage-April 0.566 lb


Ladoga-November 0.562 lb
Ladoga-April 0.601 lb


Lola-November 0.484 lb
Lola-April  0.513 lb


Rapsodie-November 0.417 lb
Rapsodie-April 0.653 lb


BeOrange-November 0.511 lb
BeOrange-April 0.598 lb 


Brandymaster-November 0.903 lb
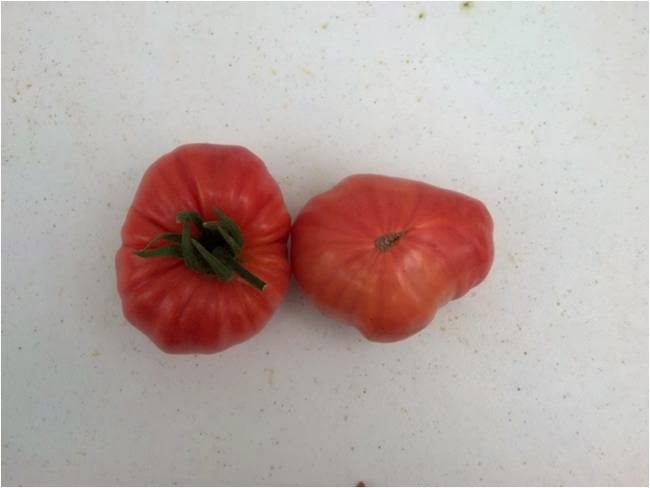
Brandymaster-April 0.910 lb


Montenegro-November 0.431 lb
Montenegro-April 0.535 lb


Thursday, October 17, 2013

Dialing in on the Downy: Dealing with Basil Downy Mildew in your Greenhouse


Dialing in on the Downy: 
Dealing with Basil Downy Mildew in your Greenhouse
By Dr. Natalie Bumgarner

http://hyg.ipm.illinois.edu/article/php?id=467
Some basic facts on basil downy mildew

Basil downy mildew (Peronospora belbahrii) is a disease that is rapidly getting the attention of many of hydroponic greenhouse growers. Over the last couple months, we have heard from growers in several states who are now facing this disease. So, I want to take an opportunity in this blog to introduce growers to the threat and present some information as well as sites for further research. Knowledge and preparation are some of the best steps to prevent or mitigate losses in our greenhouse
basil crops.

In the continental US, reports of basil downy mildew were first confirmed in late 2007 and the disease has been widely distributed from 2008 onward. Significant crop losses in both outdoor and greenhouse production have been reported since that time for a couple reasons. First, a new disease situation can be a challenge because growers are less prepared for the appearance of a relatively new disease and the development of chemical or other control measures likely are not complete from a broad industry perspective. Secondly, any infection on the leaf can result in unmarketable crop due to appearance and rapid deterioration after harvest, so losses can mount quickly. 

Tracking its spread

Basil downy mildew can be spread through seeds or airborne spores, so the disease can affect crops from multiple sources. Work is underway to develop and implement accurate tests to identify the pathogen on seeds and enable sale of disease-free basil seeds. This will be crucial to more effective control of the pathogen in the future, but growers must also be vigilant in terms of the threat from airborne spores. The pathogen can overwinter in warm areas (such as southern Fl) and can be distributed through airstreams as the growing season progresses. This means that the incidence and frequency of infection often moves northward during the late spring and summer months. Monitoring and reporting programs are available for growers to be better aware of when outdoor or greenhouse crops in their area have been reported with basil downy mildew. The first site listed in the additional information section at the end of this blog has info on the monitoring program. 

Recognizing the signs


Early symptoms can mirror nutrient deficiency, so it is important to check for fungal growth under the leaf, which can develop only 2 to 3 days after infection.

The stages of impact


The image on the left illustrates early stage infection while the plant on the right has a more severe infestation that  render the entire plant unmarketable in addition to producing spores that will likely infect nearby plants. Impacts in a greenhouse can be severe as the pathogen can spread quickly under greenhouse temperature and humidity ranges because they are conducive to rapid multiplication. 


Preventing disease

Preventative steps fall into two main categories for growers. The first occurs in seed and cultivar selection. As discussed earlier, disease free seed is going to become increasingly available in the future. Additionally, it has been demonstrated in various tests that sweet basil (Ocimum basilicum) is the most susceptible to basil downy mildew. Red leaf basil as well as Thai basil and the lemon and lime basils have generally been shown to be more resistant than sweet basil.

The second important element in preventing the disease is controlling the environment in your greenhouse to minimize conditions that lead to the reproduction and spread of the disease. It will be crucial in the prevention and control of the disease to reduce leaf wetness by maintaining lower relative humidity and increasing air flow in the greenhouse. Such steps can include maintaining slightly higher temperatures to reduce relative humidity, increased lighting (or decreased shading), as well as increasing air circulation through addition of fans or some other method. 

Control options

First step- Assess the extent of infection

The important first step in addressing basil downy mildew is to determine the severity of infection. In some cases, removing the most affected plant material from the greenhouse may be needed as remediation of affected tissue is challenging. Infected plants often are completely unmarketable and may pose more risk than reward if left in the greenhouse. In some instances, the removal of a few plants may be adequate if the disease is caught in the early stages. How much of the crop with mild to moderate infection that should be removed is kind of a judgment call, but this is not known as an easy disease issue to control. Another step that can help if the older plants are highly infected is starting new seedlings in a separate area where the inoculum cannot
spread to them from the older plants while you are spraying to control the disease

Second step- Decide on a control approach

Spray and chemical options: There are not as many weapons as we might like in terms of spray materials for use in greenhouses for basil downy mildew, but there are a few tools at our disposal. Another thing to keep in mind is that these controls have been shown to be more effective as a preventative, so spraying to prevent infection on the plants that are still healthy is one of the most important goals.
In the organically certifiable or softer category, there are hydrogen dioxide products (Oxidate), biologicals (Actinovate) as well as potassium bicarbonate (Milstop) products. These are labeled for use in greenhouses and on downy mildew, but in tests have not generally been the most effective materials for controlling active infections.
In terms of conventional fungicides, some products that have been listed as most effective and labeled for greenhouse use are cyazofamid (trade name Ranman), phosphanates (trade names such as ProPhyt, Fosphite, and Fungi-Phite) and others detailed in the additional resources. It is best to alternate use of chemicals to try and prevent pathogen resistance. Further information of specific chemical products and 
tests of their relative efficacy are available at many of the sites listed in the additional resources section

Third step- Watch the disease closely and keep on top of the spray schedule 

Remember, this disease is most effectively prevented rather than controlled. So, there is a need to spray both for control and prevention under conditions that are most conducive to the disease. One thing to keep in mind as you implement your control plan is that a backpack sprayer  is going to be difficult to get adequate leaf coverage because the underside of the leaf is where the pathogen is most present. If frequent spraying is needed, it is worth considering acquiring  some type of air assisted mist blower or high pressure cold fogger.
Arming ourselves with information, remaining vigilant in environmental control and scouting and acting quickly if disease is found are all key in managing the risk of basil downy mildew in our greenhouse crops. 

Additional information

Friday, September 6, 2013

Spring to Summer Romaine Lettuce Trial


Spring to Summer Romaine Lettuce Trial
Romaine in NFT production in Ohio
By: Dr. Natalie Bumgarner

Introduction

Romaine lettuce can sometimes be a challenging lettuce crop to produce in the greenhouse due to its susceptibility to tipburn and related quality deterioration. However, there often appears to be a solid market for high quality, locally produced, romaine. In addition to environmental challenges, romaine cultivars specifically bred and developed for controlled environment production are less common than bibb cultivars. This trial was designed to evaluate a selection of romaine lettuce cultivars through a range of spring and summer conditions to evaluate their potential for greenhouse growers in the Midwest and northeast. 

Methods and Management

Primed and pelleted seeds were seeded by hand in pre-moistened 1” x 1” x 1 ½” rockwool cubes. Seeds were germinated in clear water in seeding trays, and were transferred to the nursery and nutrient solution 4 to 7 days after seeding. Seedlings were produced in flowing nutrient solution in the nursery for  approximately an additional week before transplanting (Run 1 and 2 were provided supplemental lighting during the seedling phase). After transplanting, lettuce plants were grown out in the channel for approximately four weeks prior to harvest. The nutrient solution was continually cycled through the Fertroller where automatic pH and EC adjustments met programmed solution set points. The pH was maintained at 5.8 by the addition of dilute sulfuric acid. EC was maintained at 1.6 to 1.8 (lower light levels = higher EC) by the addition of concentrated fertilizer solution and source water. 

* It is important to note that these trials were carried out over set periods of time and harvests were made regardless of plant readiness for sale because clear comparisons were the main goal. In a commercial operation, more (or less) time may have been give these heads to reach a consistent saleable size and crop quality. 

Transplants 2 weeks after seeding


Some thoughts on the trial

In these data, there are a few items that are important to consider and understand about this trial.

1)  The first important fact to glean from these numbers is that the performance of the cultivars was fairly consistent, even though there were large variations across runs.  Green Forest and Salvius tended to be the higher yielding cultivars (in all runs except #2, discussed below) while Helvius was intermediate and Maximus and Counter were the two lower yielding cultivars in most trials. It is useful for growers to see that across both spring and summer conditions, these trends were fairly consistent. The yield trends could be influenced by the growth habits of these plants. Green Forest and Salvius were usually taller plants that were open longer while Helvius tended to form a head a little earlier. Maximus was a very open cultivar in most of our trials while Counter formed a smaller head. Cultivar choices should be made both on yield potential but also the plant form suitable for markets. 

2) Nutrient solution conditions  may have been a key factor.
 In viewing these numbers, there are a couple of key items to keep in mind. During the middle of May, we had an issue with our source water here at CropKing. The softener that we were relying upon was not functioning properly and the plants were receiving higher than optimum levels of sodium. This solution issue likely led to reduced growth and increased tipburn in run 2. Our new reverse osmosis system was installed on May 21st to correct these issues. However,  we then had a chlorine spike in our municipal water source that created some root damage and plant stress on June  13th. (Source water may need to be the topic of  a blog post in the near future!)  So, it was likely not until the 4th run that impacts of the improved source water quality can be observed. Keep in mind, though, that higher summer light and temperature were likely also a source of the higher yields in run 4. Temperature in Ohio was quite moderate for most of June and July and these crops were grown without a shade cloth on the greenhouse to take full advantage of available light. As with most contributors to plant growth, light, temperature and the impact of other stresses often cannot be completely separated in greenhouse work. 

3) There were some differences in quality across the runs and the cultivars. Specific  data on plant quality was not collected in this study in a way that allows statistical comparisons. However, it should be noted that Counter had some heads with tipburn in all 4 runs (see below). Tipburn was observed mainly in Counter in Run 1 and in all cultivars in Run 2, while tipburn levels in all cultivars were reduced in runs 3 and 4.  


A picture is worth a thousand words..


Counter Run 1
Counter Run 4

Green Forest Run 1
Green Forest Run 4

Salvius Run 4
Helvius Run 4
Helvius Run 1
Salvius Run 1